Bootstrap Checkbox Example
Introduction
Once in a while the elementary aspects might just become quite critical-- especially the moment you come to need them. As an example exactly how do your site visitors connect with the webpages you set up specifying a basic Boolean act-- just yes or no regarding some of the issues you want to ask, precisely how they do confirm the conditions and terms or maybe line up a handful of the attainable preferences they might possess. We normally surpass this with no paying a lot of an interest to the feature liable for these sorts of activities but the Bootstrap Checkbox Toggle is really a really significant element-- one our forms can not in fact do without.
Inside newest fourth version of the Bootstrap platform we are provided with the
.form-check.form-check-label<div>.form-check.form-check-label<label><input>.form-check-inputEfficient ways to use the Bootstrap checkbox:
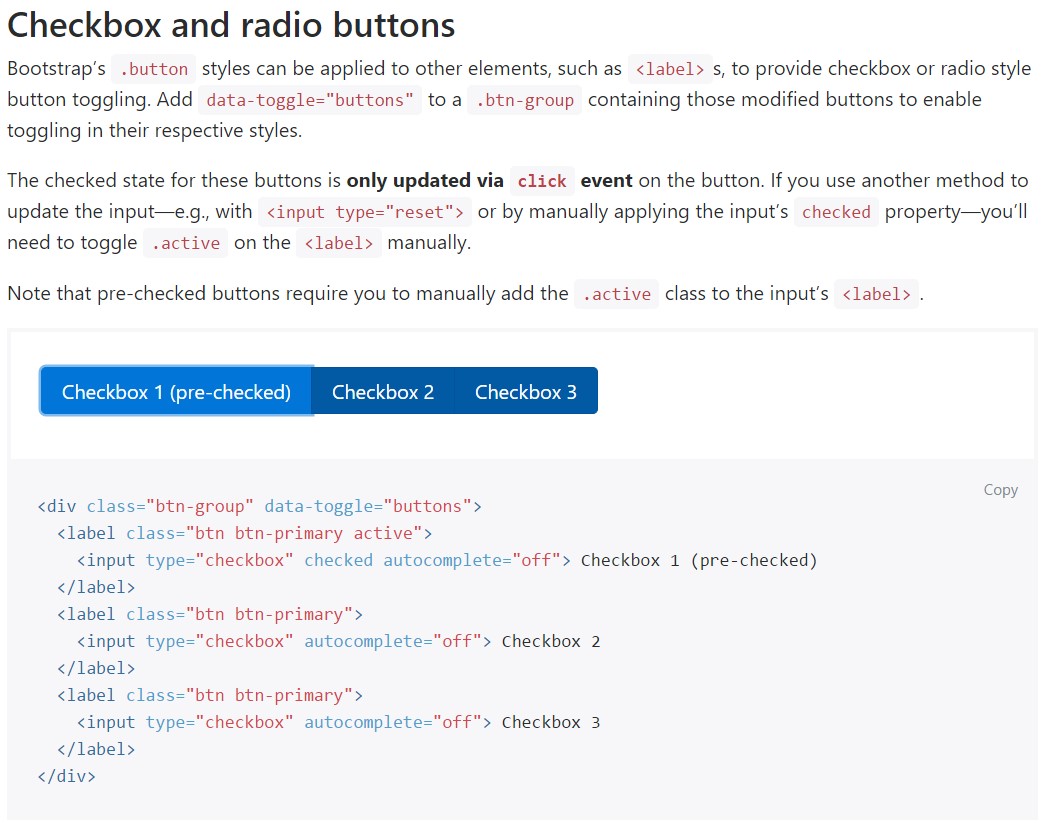
Bootstrap's
.button<label>data-toggle=" buttons".btn-group
<div class="btn-group" data-toggle="buttons">
  <label class="btn btn-primary active">
    <input type="checkbox" checked autocomplete="off"> Checkbox 1 (pre-checked)
  </label>
  <label class="btn btn-primary">
    <input type="checkbox" autocomplete="off"> Checkbox 2
  </label>
  <label class="btn btn-primary">
    <input type="checkbox" autocomplete="off"> Checkbox 3
  </label>
</div>
Sometimes we need to have the checkboxes to come inside our forms without the user truly being able to bring some action clicking them-- that is really where the disabled option appears in.
To disable correctly a checkbox in Bootstrap 4 utilizing the common HTML attribute
disabledOn the occasion that you enjoy the concept and simply desire to accomplish this you must assign the
.disabled.form-checkA different representation
Whenever you are using checkboxes, wrap them in a
<label>.custom-control.custom-checkboxWork with
.custom-control-input<input>Additionally work with two
<span>.custom-control-indicator.custom-control-description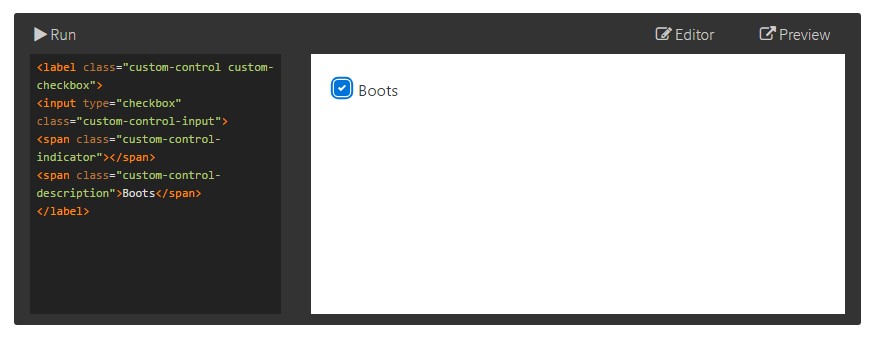
<label class="custom-control custom-checkbox">
<input type="checkbox" class="custom-control-input">
<span class="custom-control-indicator"></span>
<span class="custom-control-description">Boots</span>
</label>
Bootstrap Checkbox Style forms
Default checkboxes and radios are upgraded upon with the assistance of
.form-checkDisabled checkboxes and radios are assisted, still, to supply a
not-allowed<label>.disabled.form-checkA new detail for the Bootstrap edition 4 framework is the initiation of the so called custom-made form features. These are actually the same elements we are used to in capability though styled even more appealing and with the Bootstrap method. With them you are able to bring in amazing taste and style to your web content through just assigning a couple of additional classes to the controls you involve in your forms.
In order to apply custom-made checkboxes wrap them inside a
<label>.custom-control.custom-checkbox<input>.custom-control-input<span>.custom-control-indicator.custom-control-descriptionConclusions
That's mostly all you must complete in order to include a checkbox component for your Bootstrap 4 powered web pages and add a number of custom flavor to it providing it a fancy looks. Currently all you have to do is repeat the exercise till you have actually examined every one of the checkboxes wanted are readily on the web page.
Take a look at a number of video clip training relating to Bootstrap checkbox
Linked topics:
Bootstrap checkbox formal documents
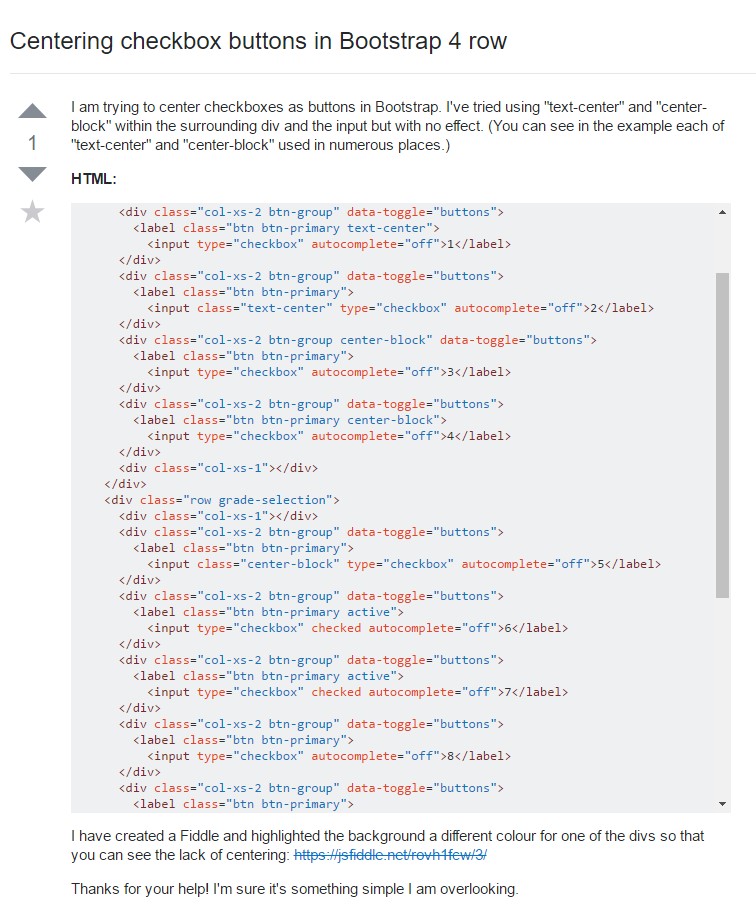
Centering checkbox buttons in Bootstrap 4 row
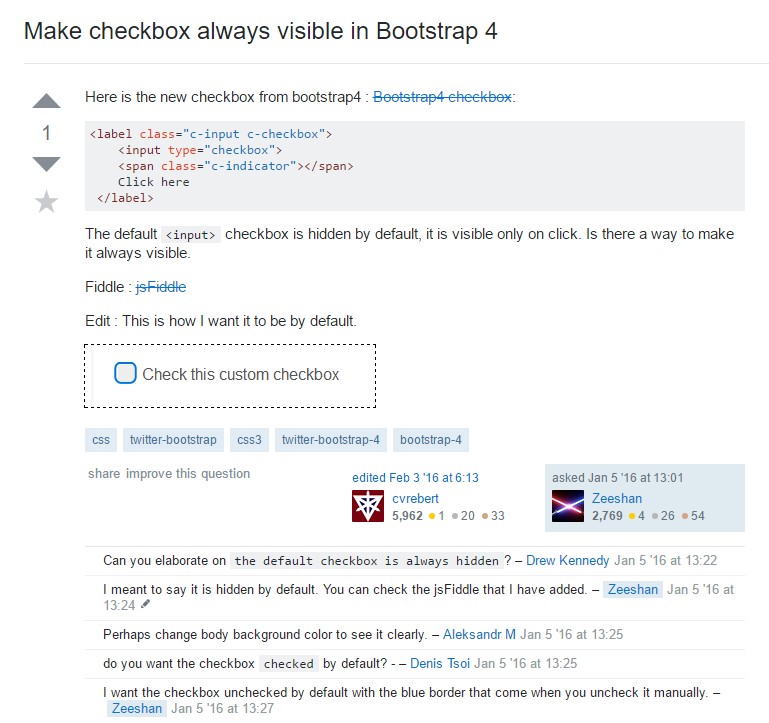
Make checkbox always visible in Bootstrap 4